
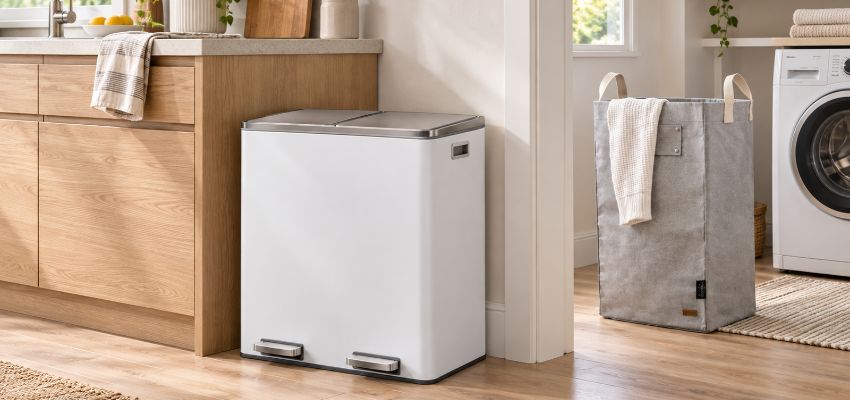
A useful bin setup makes the next action obvious: where to put something, how to sort it, and how to carry it out.
Start with a place for everyday trash and a place for the recyclables your local program accepts. Add other collection points where waste regularly appears. Separate bins give you flexibility, divided bins keep sorting together, and cabinet bins free up floor space at the cost of storage and access.
The right trash and recycling bins do not have to match. They need to suit what your household throws away, where it happens, and who empties them. A tidy-looking station loses its appeal quickly if bottles pile up beside it or every bag change becomes a wrestling match.
Before comparing capacities or finishes, establish what your household actually needs to keep separate. That decision determines the layout.
- Check accepted materials Use your local collection provider’s current instructions, rather than the recycling symbol or a bin’s printed label.
- Check required separation Some programs accept mixed recyclables; others require separate streams. Your indoor containers should support that arrangement.
- Check collection instructions Confirm whether materials must be loose, which containers are permitted, and how food scraps are handled if a separate service exists.
The EPA explains that local recycling requirements vary, including whether materials can be collected together. A divided indoor bin cannot replace those instructions, and adding more compartments does not automatically improve sorting.
Also distinguish an indoor holding container from the container used for pickup. You might carry a small kitchen recycling basket to a larger outdoor cart several times between collections.
The basket needs to suit that carrying routine; it does not necessarily need to hold a whole collection cycle’s worth.
A food-scrap pail is another possible stream, but only when you have a suitable destination for its contents. Check what your composting method or collection program accepts before reserving space for it.


Choose Separate Bins for Flexibility
Separate Bins Let Each Stream Grow
Separate cans let you pair a smaller trash container with a larger recycling bin, replace one without replacing both, or move a container as habits change. They are particularly useful when packaging fills up much faster than the remaining household trash.
They do not always need to stand side by side, but the separation should make sense during use. If someone must cross the room to recycle an empty container, the counter may become its unofficial holding area. Start by looking for two accessible positions near the place where most sorting happens.
Divided Bins Keep Sorting Together
With divided bins, trash and recycling share one location, but their capacities remain separate. A hypothetical 16-gallon can split evenly gives you 8 gallons per side—not 16 gallons for trash plus room for recycling.

Check the capacity and opening of each compartment, along with how its contents come out. A narrow bucket may hold plenty by volume yet be awkward for bulky packaging. If one side repeatedly fills while the other stays nearly empty, the split may be wrong for your household.
- Keeps both disposal choices in one location
- Creates a single station to position
- Fixed compartments may fill at different rates
- Narrow openings can complicate bulky-item disposal
- Each bucket needs clearance for removal
A divided can is most useful when its individual compartments work well, rather than when the combined capacity sounds impressive. Concealing the station introduces a different compromise: access.
Cabinet Bins Trade Storage for Floor Space
A dedicated pull-out cabinet can hold bins away from the walking route. The space beneath a sink is less predictable: pipes, a disposal unit, hinges, and the sink bowl may interrupt what looks like an empty rectangle.
The usable space for under-sink bins depends on those obstacles as well as the door opening.
Check the bin and any frame together, including the space needed to pull it forward and lift out a bag. Follow the selected model’s installation requirements rather than assuming every cabinet can accept the same hardware.

Consider what must move out of the cabinet, too. A hidden bin is less convenient if it displaces frequently used supplies into an awkward spot or requires you to move bottles every time you empty it.
Size Each Bin Between Emptying Trips
-
Estimate each stream separately
Notice how much trash remains after accepted recycling and any separately handled food scraps are removed. Give recycling its own estimate instead of assuming an equal split.
-
Use your actual emptying interval
Choose capacity for the time between trips from the indoor bin to its next destination. That may be much shorter than the interval between curbside collections.
-
Keep the load manageable
Allow for the weight of a full bag or bucket, the person carrying it, and the route. More volume is not useful if it creates a load that is difficult to lift.
Household size provides context, but it cannot settle kitchen bin size by itself. Imagine two two-person homes: one cooks most meals and handles food scraps separately; the other produces frequent takeout packaging. Their trash and recycling capacities may need very different proportions.
Use your current arrangement as evidence. If bags consistently overflow before the usual emptying trip, consider more capacity or a shorter interval. If you remove partly filled bags because of their contents or smell, a larger can may simply leave more unused space.
Capacity also needs a physical home. Before settling on a larger size, check whether the proposed position remains comfortable during disposal and bag changes.
Measure Space for Opening and Emptying
-
Measure the usable footprint
Record width, depth, and height at the intended position. Inside a cabinet, measure around obstructions and through the actual door opening.
-
Check the opening motion
Allow for the lid, pedal, cabinet door, or pull-out frame. Compare the manufacturer’s open dimensions where available, not just the closed height.
-
Leave room to remove the contents
Check whether a full bag or inner bucket can lift clear without hitting a counter, shelf, hinge, or pipe.
-
Walk the route
Make sure the bin does not block a drawer, dishwasher, doorway, or regular path. Include the space someone needs to stand beside it.
The most useful small-kitchen bins fit an available position without making nearby tasks harder.
A slim can may suit a narrow gap, but it still needs an accessible opening and a clear emptying route. The smallest exterior dimensions are not automatically the easiest arrangement.
Compare bin shape against the actual location. A flat side can sit neatly against a cabinet, while a round body may suit an open spot.
Use the dimensions of the models you are considering; shape alone does not establish capacity, stability, or ease of bag removal.
Choose a Lid Everyone Can Use
The difference between pedal and swing lids becomes clearer when you picture the actual disposal motion. Can the person using the bin approach it, open it, and release the item without reaching awkwardly or pushing waste against the lid?
Try that motion from the position where the bin will stand. A pedal tucked into a tight corner may be hard to reach; a sensor beneath a low counter may behave differently from one in open space.
Check the specific design rather than treating the opening mechanism as a guarantee of convenience.
A lid can hide contents, but do not assume it makes a can odorproof or pet-resistant. If either matters, inspect the closure and any locking features, and follow the product’s stated limits. Also check whether the underside and hinge area are accessible for cleaning.
Add Room Bins Where Waste Collects
Add a collection point where tissues, wrappers, paper, or other waste repeatedly accumulates. An occasional item may not justify another container.
Position the bin near the activity that creates the waste, without obstructing movement or making the opening difficult to reach.
Give each bin a clear destination and a practical carrying route. Small containers still need attention before they overflow.
Check access to the bottom, liner holder, lid underside, and any removable bucket. Match the container to the kind of waste it will receive.
For bathroom bins, a lid may provide welcome discretion, but bag changes still need to be straightforward. A can that fits tightly between the toilet and vanity can become frustrating if you must move the whole thing to reach its inner bucket.
At a desk, a paper collection point is useful when accepted paper regularly builds up. It does not necessarily need a separate compartment for every recyclable material. Follow the same sorting requirements as the main household station, then empty it into the appropriate next container.
Bedrooms and laundry areas deserve the same practical test: does waste collect here often enough that a nearby bin removes a recurring nuisance? If you add one, include it in the household emptying routine. A bin that stays forgotten is storage for a future chore.
Match Liners to Fit and Weight
Check the bag’s width and length against the can’s opening and depth, including enough material to secure it at the rim and cover the bottom.
Containers with similar capacities can have different proportions. A bag can be large enough by volume yet too narrow at the opening or too short to sit properly.
Accurate liner measurements matter most with tall, narrow, or unusually shaped cans. The bag should reach the bottom without hanging from the rim under the load, while its opening stays secured as intended by the can’s design.
Plasticplace’s bag-sizing guidance accounts for both the opening and the material needed to cover the bottom. Use the selected bag’s published dimensions or the can manufacturer’s liner recommendation rather than relying on capacity alone.
Fit and strength solve different problems. Heavy-load bags may be appropriate for demanding contents, but they do not make an overfilled bag lighter or remove sharp edges.
If a bag tears during removal, check its load, the can’s internal surfaces, and any point where it catches before assuming thickness is the only issue.
With slipping liners, check whether the bag reaches the bottom and whether the rim, ring, or retaining system holds it correctly.
A better fit may solve the problem without replacing the can. For recycling, confirm whether liners are needed at all and how the contents must be transferred for collection.
Once the layout, access, and liner fit make sense on paper, give the arrangement a trial. The everyday motions will reveal more than a matching finish ever could.
- Check that everyone can identify and reach the right opening.
- Confirm that each stream fits between realistic emptying trips.
- Make sure full bags and buckets can leave the station comfortably.
Use your existing containers to try the proposed locations through a normal household routine and emptying trip. Mark the footprint of a larger can with removable tape if you need to check floor space; use a clean cardboard mock-up to assess a cabinet opening.
Notice what happens: packaging left beside the station may signal poor access or insufficient recycling capacity; an awkward carry may call for a smaller bucket or a different route. Identify the recurring problem before choosing the replacement.
Write down the location, capacity needed for each stream, opening clearance, and liner requirements. Then choose the setup that solves those specific problems. A practical arrangement makes sorting easy and emptying ordinary—and ordinary is a fine achievement for a trash can.
