

Choose bathroom cleaning tools by the surface they touch and the places they need to reach.
The bathroom cleaning tools you need usually start with soft cloths, a surface-safe sponge, a small detail brush, and a dedicated toilet brush. Those cover different jobs: wiping broad surfaces, lifting residue, reaching narrow gaps, and cleaning inside the bowl. A squeegee, longer handle, or powered scrubber becomes useful when your fixtures give it a specific job.
Before choosing a rougher pad or a stronger brush, check the fixture’s material and care instructions. A tool that suits a tiled shower floor may be unsuitable for an acrylic tub or a coated faucet.
Start by looking at what you already use. The useful question is whether each surface has a suitable tool – not whether your cleaning caddy contains every type of bathroom brush.
Start With Four Basic Cleaning Tools
These are four tool types, rather than a rule to own exactly four pieces. You may need several cloths to keep tasks separate, while one suitable sponge can cover more than one non-toilet surface. Gloves and cleaning products are separate choices: follow their labels and the fixture’s care guidance.
Next, work through the fixtures. Start with the material, then consider the shape of the area you need to reach. That order helps avoid buying a specialty tool that reaches the dirt but damages the finish.
Use Soft Cloths on Sinks and Faucets
-
Check the material and finish
The sink basin, countertop, and faucet may have different care requirements. A soft cloth is a useful starting point, but any cleaner, sponge, or brush must suit the particular surface.
Look forCare instructions for the basin, counter, and faucet separately.AvoidAssuming one bathroom cleaner or pad suits all three. -
Match the tool to the space
A cloth covers the basin and exposed fittings. A small tool may help in a narrow joint, provided the finish allows it.
Look forA tool that contacts the gap without scraping nearby surfaces.AvoidForcing stiff bristles against a coated faucet. -
Distinguish residue from surface damage
If a mark remains, reassess the residue and the approved cleaning method before increasing pressure. More force is not a reliable answer to every stubborn patch.
Look forA compatible method for the particular mark.AvoidRepeatedly scouring a dull, worn, or uncertain finish.
A toothpaste splash in the basin and buildup around a faucet base are different problems. The first presents a broad surface to wipe; the second may sit in a narrow seam. Even there, a brush is not automatically the right choice.
KOHLER’s faucet guidance specifies a soft, damp sponge or cloth and warns against abrasive materials, including brushes and scouring pads, for the products covered.
Keep the finishing cloth clean, too. A cloth carrying toothpaste or cleaner residue from the sink is a poor choice for the mirror above it. Moving to glass calls for a fresh working surface.
Clean Glass With a Cloth; Squeegee Away Water
For a mirror, use a clean cloth with a cleaning method approved for the mirror and its edges. Shower glass adds soap film and mineral deposits to the job. Wash away the residue with a compatible cleaner and cloth or pad before treating a squeegee as the finishing tool.
A squeegee pulls water across a smooth surface toward an edge. That makes it useful after washing glass or as part of an after-shower routine. It does not, by itself, replace cleaning an established layer of soap scum.

- Large, accessible glass panels give the blade room to work.
- Removing water after showering can fit a quick daily routine.
- A hanging location nearby makes the tool easier to use consistently.
- Small panes, fittings, and tight corners may still need a cloth.
- The blade needs to stay clean and in good condition.
- An unused squeegee adds storage without improving the routine.
A small mirror may be manageable with cloths alone, while a wide shower door gives a squeegee more useful work. Choose glass-cleaning tools that fit the panel size, access, and space around the fittings. A wider blade is less helpful if it cannot move comfortably across the glass.
The toilet needs a different kind of separation. Here, organizing the tools by task matters as much as selecting their shape.
Keep Toilet Cleaning Tools Separate
A bowl brush belongs inside the bowl. The tank exterior, lid, seat, hinges, and base need wiping tools that can follow their surfaces without bringing the bowl brush into those areas.
Choose a Bowl Brush That Reaches Under the Rim
-
Contact with the hidden underside
An effective head must physically reach the underside of your toilet’s rim. An angled section can help, but the shape still needs to fit the bowl.
Look forA head shape suited to the rim and bowl opening.AvoidChoosing by head size alone. -
Contact with the bowl’s curves
The head should work around the bowl without requiring awkward pressure. Scrubbing performance depends on the head design as well as its material.
Look forUseful contact around curves and the lower bowl.AvoidAssuming a material name proves cleaning performance. -
Manageable upkeep
Consider how the reusable head and holder will be cleaned and dried, or how replacement heads will be stored and discarded.
Look forAn upkeep routine you can maintain.AvoidIgnoring holder cleaning, refills, or replacement availability.
Check under-rim reach before making material the deciding factor. A head that misses the hidden surface cannot solve that problem simply by having firmer bristles or a more flexible edge.
The choice between silicone and bristles also involves head shape, scrubbing contact, and ease of rinsing. Neither label tells you everything about how a particular brush will work in your toilet.
If you prefer changing heads rather than maintaining a reusable brush head, disposable toilet wands introduce recurring refill costs and used heads to discard.
Compare that ongoing routine with the cleaning and storage a reusable brush requires. The detailed comparison belongs at that decision point; the basic kit does not need both systems.
Once the bowl tool is covered, consider what will touch the outside of the toilet. A separate cloth system makes those tasks easier to distinguish.
Wipe the Exterior With Toilet-Only Cloths
-
Make the cloths easy to identify
Reserve a distinct color or clearly marked group for the toilet exterior. Keep them separate from cloths used on sinks, counters, and glass.
-
Have a fresh surface available
Use clean cloth faces and change cloths as they become soiled. Do not carry a dirty face from the base back to the seat or handle.
-
Plan for care after use
Keep used cloths out of the clean supply and wash them according to their care instructions. Clean reusable tools and holders according to their manufacturers’ directions.
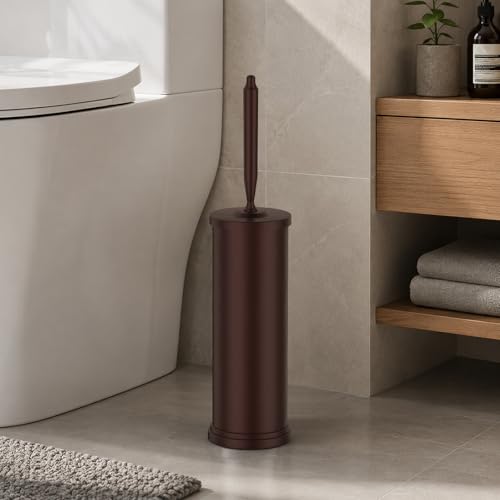
A holder is part of the bowl-brush choice, rather than an afterthought. Leave a practical place to dry the toilet brush without dripping across the floor, and choose a holder you can access for cleaning. An elaborate stand offers little value if its interior is difficult to maintain.
Tubs and showers shift the question back to surface compatibility. They also combine large areas with small recesses, so one head may not make useful contact everywhere.
Match Tub and Shower Tools to the Surface
Separate three questions: what can safely touch the finish, what shape reaches the dirt, and what handle lets you work comfortably. A powered motor answers none of those questions on its own.
Use Surface-Safe Pads on Smooth Surfaces
-
Identify the tub or wall material
Acrylic, fiberglass, tile, stone, and coated panels can have different restrictions. Use the care guidance for the actual fixture.
Look forExplicit compatibility with the material and finish.AvoidTreating every white tub or smooth shower panel as the same material. -
Check the pad as well as the cleaner
An approved cleaner does not make an abrasive pad suitable. Both parts of the cleaning method need to match the surface.
Look forA compatible cloth, sponge, or pad.AvoidAssuming a bathroom label guarantees suitability. -
Choose a workable head size
A broad head covers open walls and tub sides efficiently. A smaller head gives more control near fittings and curves.
Look forCoverage without losing access around obstacles.AvoidBuying the largest head when the fixture has little open space.
For example, acrylic tub scrubbers need to suit the tub’s care requirements before handle length or scrubbing speed enters the decision.
The American Cleaning Institute’s surface guide distinguishes materials and their care needs; the fixture manufacturer remains the reference for your particular finish.
A compatible broad pad can still miss recessed areas. If residue remains in a line or groove while the surrounding surface comes clean, examine the tool’s contact before pressing harder.
Use Brushes for Grout and Textured Floors
A narrow brush can follow a grout line more directly than a wide sponge. Choose a head that fits the line and bristles permitted by the tile and grout care instructions. Nearby stone, metal trim, and sealants may introduce additional restrictions.
On textured shower floors, a cloth may pass over raised areas while missing the recesses. A suitable bristle head can make contact within that pattern. The goal is to reach the grooves with controlled pressure, rather than select the stiffest brush available.
If grout is crumbling or a sealant joint is splitting, stop treating the area as a scrubbing problem. Cleaning cannot repair a failing joint, and aggressive brushing can disturb it further.
The same fit-first approach applies to accessible door-track corners and drain edges. An existing detail brush may be enough if the surface allows it and the head fits. That does not mean reusing a toilet detail brush elsewhere, or expanding routine fixture cleaning into drain repair.
When the head is suitable but the work remains difficult, identify what is difficult. Reaching the far wall and repeating a scrubbing motion are separate reasons to consider an upgrade.
Add Reach or Power Where Needed
A longer handle may help you reach a low shower floor or a distant wall from a more comfortable position. Check the working length, grip, head angle, and control near fittings. Extra length becomes a disadvantage if the head feels difficult to position in a small enclosure.
Power addresses a different need: repeated scrubbing motion. Consider electric spin scrubbers when that repetition is the problem and a compatible attachment is available. They still need guiding, cleaning, storage, and charging.
- Repeated scrubbing is the main difficulty after choosing a compatible cleaner and head.
- The tool’s working weight and grip suit the person using it.
- Compatible replacement heads are available for the surfaces involved.
- Most cleaning involves quick wiping or small, delicate areas.
- A manual extension handle already solves the reach problem.
- Charging, attachment care, and storage would make the routine harder to maintain.
Check the exact model’s instructions before using a powered tool around water, including which parts may get wet. A motor does not make an incompatible attachment suitable for acrylic, coated fittings, or delicate joints.
By this point, an upgrade should have a clear purpose. You should be able to name the surface, the job your current tool misses, and how the replacement would help.
Fill Gaps in Your Kit Before Buying More
Put your bathroom cleaning tools beside a short list of the fixtures they serve. Check that each has a compatible wiping or scrubbing tool, that toilet supplies stay separate, and that reusable tools have a practical place to dry.
Then identify any remaining gap: a brush that misses the rim, a pad that cannot reach a groove, or a handle that leaves you stretching. Choose the tool that solves that particular problem. If the existing kit already covers the work, it is ready to use.
