
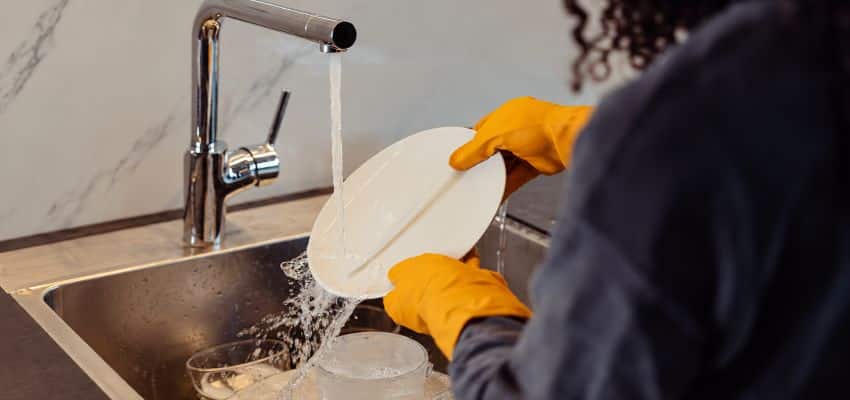
What do you actually need to wash dishes – without filling the sink area with gadgets?
For everyday hand-washing, the short answer is hand dish soap, one suitable scrubber, running water for rinsing, and a clean place to dry dishes. You may already own most of that. The harder part is knowing when a brush, non-scratch pad, glass cleaner, or drying rack solves a real problem rather than creating another item to store.
This guide starts with the smallest workable setup, then helps you adjust it to the dishes you wash, the sink you have, and the counter space you can spare. It is a practical essentials guide – not a ranking of products you must buy.
Start with three essentials – not a shopping cart
- Remove grease and food A hand-dishwashing liquid designed for washing dishes in the sink.
- Loosen what sticks One sponge or brush that suits the surfaces and shapes you clean most.
- Let clean dishes dry A clean towel, drying mat, or rack with enough room for your usual load.
Water, a usable sink or basin, and a place to rinse are part of the setup; they are not extra gadgets to purchase.
Start by checking what you already have. A clean sponge and a towel laid out on an uncluttered counter can be sufficient for a small load. Buying a rack before you know where it will sit – or buying three scrubbers before trying one – adds storage problems without necessarily making dishwashing easier.
Dish soap does one job that a scrubber cannot: it helps lift grease and food residue from washable surfaces. Choose a product labeled for hand dishwashing and follow its directions.
A kitchen surface cleaner, laundry detergent, or automatic-dishwasher detergent is not a substitute. Keep the bottle accessible, but away from the area where rinsed dishes land so drips and clutter do not undo the clean setup.
A scrubber provides the contact: it reaches the food residue that water alone may leave behind. Softness, shape, and how well you can rinse the tool matter more than how many attachments it has.
A non-scratch claim is not universal permission to use a tool on every finish; check care instructions for delicate cookware.
A drying spot completes the process: dishes should not have to sit in a pile in a wet sink after rinsing. If you use a towel or mat, give items space and keep the fabric clean and able to dry between loads.
If you use a rack, consider where water will collect or drain. The correct answer depends on how many dishes you wash at once.
Choose a sponge or dish brush around your everyday dishes
Look at the dishes that actually pass through your sink over a normal week. Flat plates and open bowls are different from mugs with deep handles, saucepans with corners, and tall drinking glasses.
Rather than starting with a claim that one tool is universally better, choose the one that reaches your most common surfaces with the least awkward movement.
-
Match the shape
A flexible sponge conforms to broad, curved surfaces; a handled brush can work around rims, handles, and edges.
Look forA head that contacts the surfaces you clean every day.AvoidA large or stiff head that misses narrow corners. -
Respect the finish
Some cookware needs a soft, nonabrasive cleaning surface. Follow the manufacturer’s care instructions.
Look forMaterials suitable for your most delicate regularly washed item.AvoidUsing rough scouring pads on vulnerable coatings. -
Consider your grip
A sponge provides direct control; a handle may reduce the need to put fingers into greasy water.
Look forA grip you can hold comfortably when wet.AvoidA slippery handle or a bulky tool that strains your wrist. -
Plan how it dries
The best everyday scrubber is one you can rinse and leave in an airy location after use.
Look forEasy-to-rinse surfaces and a clear storage spot.AvoidLeaving either tool trapped in standing water.
Start by choosing a sponge or dish brush based on the dishes you wash most often: a sponge conforms to broad surfaces, while a handled brush can help you reach rims and corners. That difference is more useful than treating one category as automatically cleaner or more durable.
Either can become unpleasant if it stays wet and full of trapped food. Rinse the tool thoroughly after the load, remove visible debris, and leave it where air can circulate.
For example, a household that mainly washes a few plates, cereal bowls, and utensils might start with one soft sponge. Someone who regularly hand-washes pots, mixing bowls, and handled mugs may prefer a brush.
If one tool misses a recurring task, add a second for that task rather than buying a full assortment on day one.
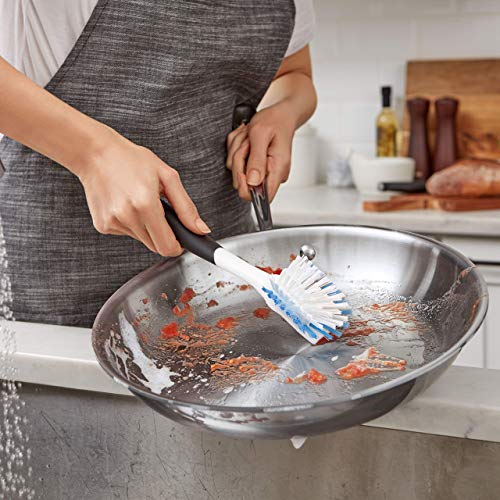
A handled dish brush is one concrete example of the second approach. The OXO Good Grips brush shown here illustrates a handle-and-bristle design; its nylon bristles do not make it appropriate for every delicate coating.
Add a specialty cleaner only when the dish demands it
The most common reason to add a second cleaning tool is not that your first one is inferior. It is that one item has a surface or shape the everyday tool cannot reach safely.
Two situations deserve special attention: cookware with a sensitive finish and narrow containers that ordinary scrubbers cannot enter.
For nonstick cookware, protect the coating before increasing scrubbing force
When food sticks to a nonstick pan, aggressive scrubbing can be tempting. Start instead by letting the pan cool as its maker recommends, soaking or softening residue when appropriate, and using a cleaning surface the manufacturer permits.
Avoid assuming that “heavy duty” or “non-scratch” on a package guarantees safety for every coating. Abrasive damage cannot be fixed by switching tools afterward.
For coated cookware, choose a nonstick-safe scrubber that follows the pan manufacturer’s care instructions rather than relying on stronger abrasion.
If only one pan in your kitchen requires special treatment, keep a gentle option for that pan rather than replacing your main scrubber with something that is poorly suited to the rest of the dishes.
For narrow glasses, reach matters more than extra pressure
A sponge may clean the rim of a tall glass while leaving the bottom untouched. A regular dish brush may be too wide to fit through the opening, and a metal core or exposed wire can create an unwanted contact point.
Measure the opening and consider the internal depth before buying a slim brush. Look for a head that reaches the base without forcing it and a tip designed to protect the glass.
If your regular scrubber cannot reach the bottom of tall drinkware, a brush for narrow glasses should have a slim head, adequate length, and a tip that will not scratch the glass. A bottle brush is an addition for a recurring access problem – not a required item for every kitchen.
If a dish is labeled dishwasher-safe or hand-wash-only, follow that item’s care directions. Tool choice should adapt to the dish; the label on a scrubber does not override the dish manufacturer’s instructions.
Set up a repeatable routine even if you have only one sink
A second basin or an elaborate organizer is not a prerequisite for hand-washing. What matters is keeping dirty dishes from taking over the rinsing area and giving clean dishes a place to go.
Clear the counter first, place the scrubber and soap within reach, and put the drying towel or rack where splashes from dirty dishes are least likely to land.
-
Scrape before you soak
Remove food scraps into the trash or appropriate disposal. Separate fragile glasses and items with special care instructions so they are not buried under heavier cookware.
-
Make space for the clean side
Set out a clean towel, mat, or rack before washing. If the counter is crowded, wash only the number of pieces that can dry without stacking.
-
Wash the less greasy items first
Use hand dish soap and your chosen scrubber on glasses, cups, and lightly soiled dishes before moving to heavily greasy pans when practical. Change dirty wash water as needed.
-
Rinse and transfer each batch
A one-sink dishwashing routine is easier to manage when you work in small batches and keep a separate clean area ready for rinsed dishes.
-
Reset the tools and sink
Rinse the scrubber, clear food debris from the sink, and leave wet tools and drying textiles where they can dry before the next load.
For raw-meat utensils or other higher-risk food-contact items, follow applicable food-safety guidance and clean or sanitize as appropriate. This is a general household workflow, not a substitute for those requirements.
The order is a flexible way to reduce clutter, not a strict ritual. If a pan needs time to soak, set it aside while you wash easier pieces. If your sink is very small, leave dirty cookware on one side of the counter and rinse in short batches.
The goal is a clear distinction between what is still dirty and what has already been rinsed.
Choose a drying spot based on load size and counter space
Drying equipment often takes more room than the soap and scrubber combined. Before buying a rack, ask three questions: how many pieces usually need to dry together, where will the water go, and can the drying setup itself be cleaned and dried?
A large rack can be inconvenient in a tiny kitchen; a small mat can become frustrating when a family-sized load leaves no space between items.
A clean towel or mat can work for a few dishes
For a single mug, plate, and a few utensils, a clean absorbent towel may be enough. A drying mat gives a defined landing area and can often be folded away.
Both need regular laundering or cleaning according to their care labels and enough airflow to dry between uses. If you routinely stack wet bowls on top of one another, a flat surface may not provide the separation you need.
A rack is useful when dishes need to stand apart
A rack earns its space when you wash enough plates, bowls, or glasses that laying everything flat becomes awkward. Dividers can hold plates upright, and an open design can provide space between pieces.
Consider whether the rack drains into the sink or onto a tray, how you will empty or clean that tray, and whether large pots actually fit.
Choosing a dish rack or drying mat depends on how many dishes you wash, how much counter space you have, and how easily you can clean and dry the setup afterward.
Choose the setup you can maintain, not just the one that looks tidiest in a product photograph.
Over-sink and compact racks solve different space problems
An over-sink rack uses space above the sink rather than the main counter, but it is only helpful if it fits the sink width, faucet height, and way you normally wash.
Check whether it blocks the tap, interferes with large pans, or makes rinsing awkward. An over-sink drying rack can free up counter space, but only if its dimensions leave enough clearance for the faucet and everyday sink tasks.
A compact countertop rack is different: it still occupies the counter, but aims to use a smaller footprint. It may suit one or two people who want dishes upright without dedicating a large area to drying.
Check the footprint with a tape measure and leave room to prep food safely.. A drying rack for a small counter should hold your usual dishes without taking over the workspace you need for preparing meals.
The OXO compact drying rack below is an example of a countertop format

A drying setup is not finished when the dishes are dry. Empty standing water, clean the rack or mat as directed, and let the drying equipment itself dry. A rack that is hard to maintain may be a worse fit than a simpler towel or mat.
If you also have a dishwasher, keep detergents separate
Owning a dishwasher does not eliminate every hand-washing task. You may still need to wash a few items between machine loads or follow hand-wash directions for certain cookware, knives, or delicate pieces.
That does not mean you should use the same detergent in both places.
- Hand dish soap
Liquid formulated for washing dishes manually in a sink or basin, followed by rinsing.
- Automatic dishwasher detergent
Detergent formulated for use in a dishwasher, according to the machine and product directions.
- Powder and pods
Two formats of automatic dishwasher detergent. Powder is measured according to directions; a pod is a preportioned dose.
Do not pour ordinary hand dish soap into the dishwasher detergent compartment. It can produce excessive suds and interfere with the machine’s operation.
If you use a dishwasher, keep its detergent in its own storage location and follow the appliance and detergent labels for dosing and handling.
The choice between dishwasher powder and pods involves dosing flexibility, convenience, and the appliance’s detergent instructions – not the hand dish soap used at the sink.
The right format depends on the appliance instructions, load, and product directions; that decision is separate from choosing the soap and scrubber for hand-washing.
Buy the minimum now, then add tools for recurring problems
The simplest way to avoid buying the wrong tools is to build the kit in stages. Start with the next normal load of dishes you expect to wash – not a hypothetical dinner party.
Make sure you can clean it safely, rinse it, and leave everything to dry without blocking the sink. Then notice where the setup genuinely slows you down.
-
Buy or use now: hand dish soap
Check that it is labeled for manual dishwashing. If you already have an appropriate bottle, use it before purchasing another.
-
Buy or use now: one everyday scrubber
Choose a sponge or brush suited to the dishes and finishes you wash most. Give it a place to dry.
-
Use what you have: a clean drying area
A clean towel may be enough for a few items. Add a mat or rack if load size or stability makes that necessary.
-
Add later: a gentle cookware cleaner
Only if a particular pan requires a different, coating-safe tool.
-
Add later: a slim glass brush
Only if tall or narrow containers regularly stay out of reach.
-
Add later: a different drying arrangement
Choose a mat, standard rack, over-sink rack, or compact rack after measuring the space and observing the usual load.
Dishwasher detergent belongs on a separate checklist if you own and use an automatic dishwasher. Gloves may be useful for comfort or skin protection, but they are not a universal requirement for clean dishes.
Example: one person with a small kitchen. If dinner usually produces a plate, saucepan, glass, and cutlery, one sponge or brush plus a clean drying towel may be adequate.
The first upgrade might be a slim brush for a reusable bottle – not a full-size drying rack that occupies the only prep area.
Example: a household washing several place settings. If plates and bowls routinely pile up while waiting to dry, a rack may solve a real bottleneck.
If nonstick cookware is part of every load, a gentle cleaning surface deserves attention before an elaborate drying accessory. In either case, the tool should address the task that repeats most often.
The final check is maintenance. Can you rinse and dry the scrubber? Can you clean the mat or rack? Can you reach the soap without splashing clean dishes? A setup that is easy to reset after dinner is more useful than a crowded collection of specialty tools.
- Start with three functions, not three shopping lists.
- Choose specialty tools for a specific surface or access problem.
- Measure drying space before buying a rack.
You do not need a drawer full of dishwashing tools to keep up with everyday dishes. Start with hand dish soap, one appropriate sponge or brush, and a clean drying spot. Use a straightforward wash–rinse–dry routine, then add a gentle cookware scrubber, narrow-glass brush, or different rack only when your normal dishes reveal a recurring need.
The best setup is the one that fits your sink, respects your cookware, and is easy to clean and put away after every load.
